
Interfacing is an additional layer that is used in certain areas of a garment to add some level of firmness and stability, structure and support. Interfacing uses are wide and varied. It can be used to support areas such as cuffs, collars, facings, waistbands and pockets.
From my experience, the most commonly used interfacing is the fusible one, but I would like to focus on the sew-in interfacing and tell you why it is my favourite.
The biggest positive for me is that it will never create those little “unglued” bubbles on the right side of your garment after washing, which can appear after a few washes with the fusible interfacing.
Sew-in interfacing can give your garment a more natural look, drape and shaping as there is less stiffness to it.
It is very easy to apply sew-in interfacing and I have outlined below step by step instructions on how to apply one to a collar.
Here are the steps for you!
STEP 1:
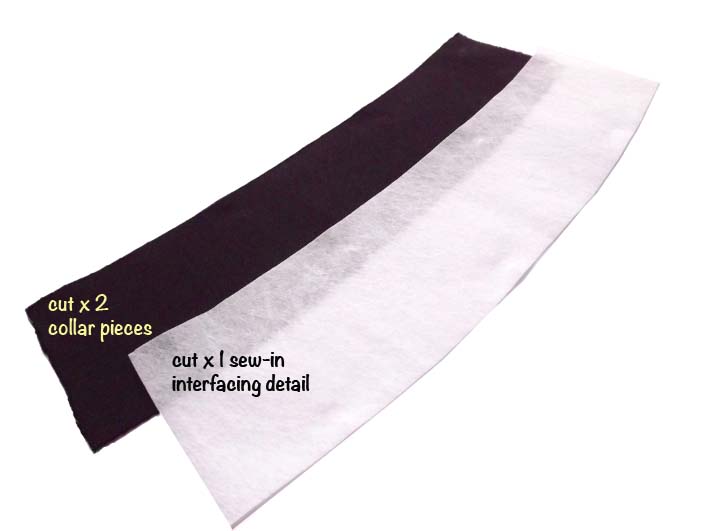
- cut out collar details
- cut out 2 x collar pieces and 1 x sew-in interfacing
STEP 2:
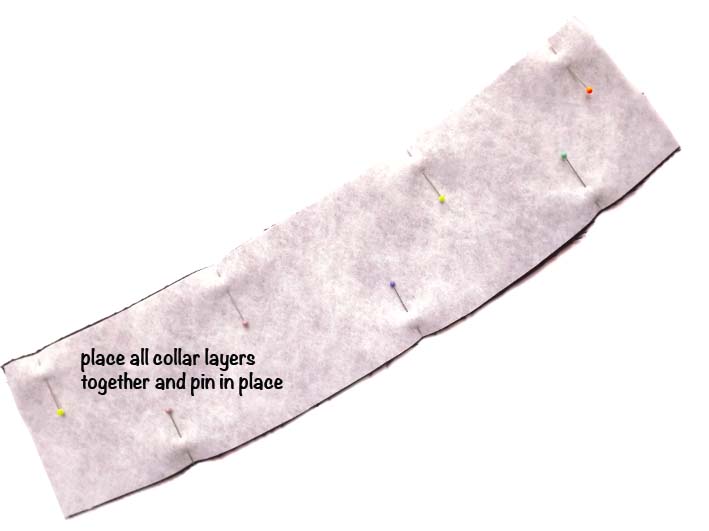
- place collar pieces together, right side to right side
- place sew-in interfacing on one side of the collar – the side which will be your collar top layer
- pin all layers in place
STEP 3:
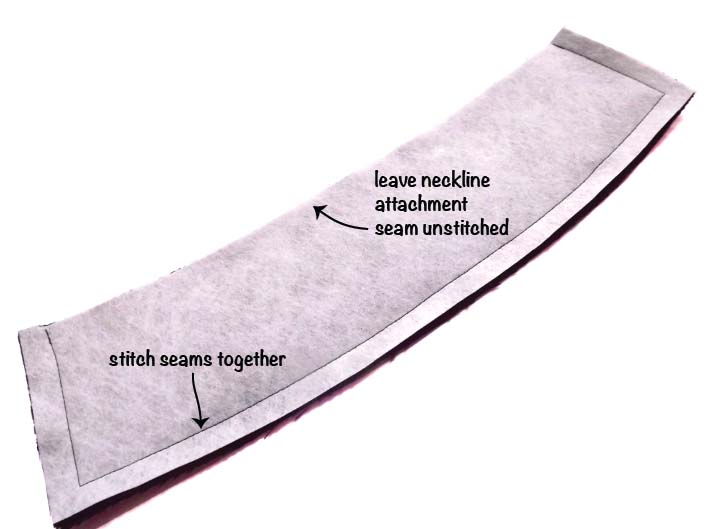
- stitch collar seams together
- neckline attachment seam should stay unstitched
STEP 4:
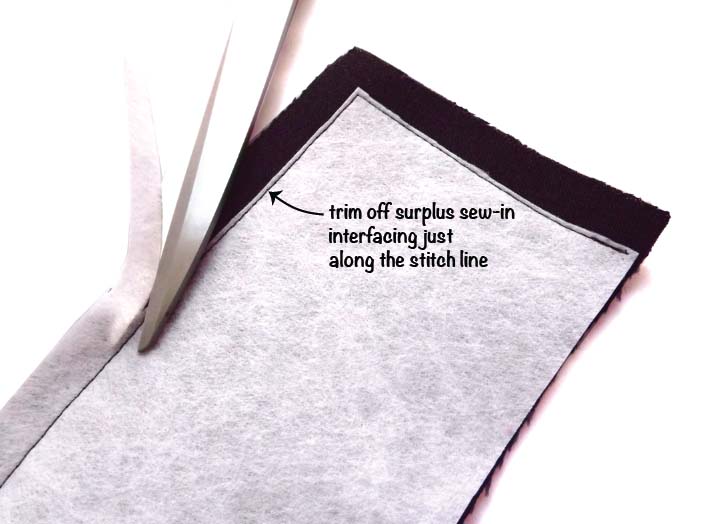
- trim off surplus sew-in interfacing just along the stitch line, as close as possible to the seam all the way around the collar
There you go – a nice, neat and clean finish. The same principal can be used for cuffs, waistbands, etc.
I hope this tutorial was helpful for you!