
A few days ago I came across one of my first skirts that I made when I was still in school. I know, I can’t believe I still have it and, surprisingly, it fits quite well too – considering how much I love cakes!
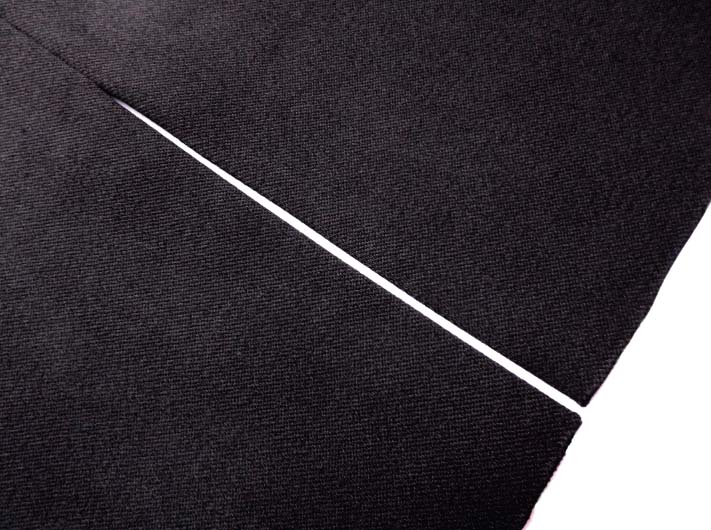
I have always liked a lined slit at the front of my skirt, as it is not only a functional element giving you more room for movement, but can also be quite a nice design feature.
Trust me, the finish of the slit on my skirt was nowhere near perfect…well, maybe just a little! So, to make your next skirt challenge all the more interesting I have put together this lined slit tutorial for you to try.
Here are the steps for you!
STEP 1:
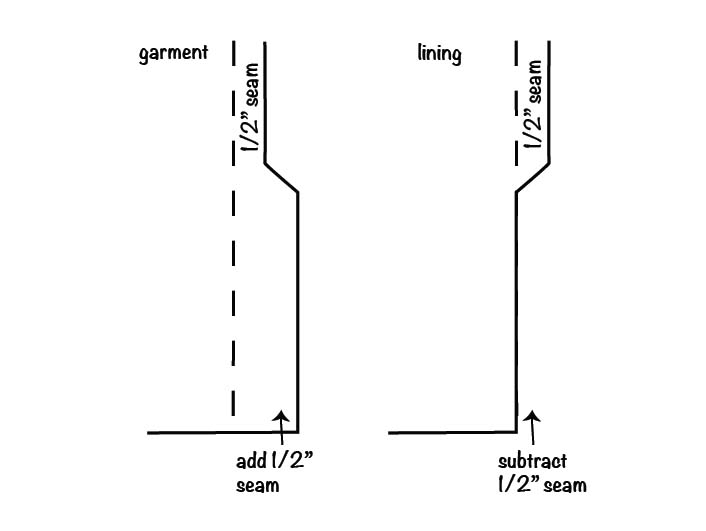

- add a slit to your skirt as illustrated above and cut out all the details
- I used a ½” seam allowance for my slit, the seam width can be changed according to your preference
STEP 2:
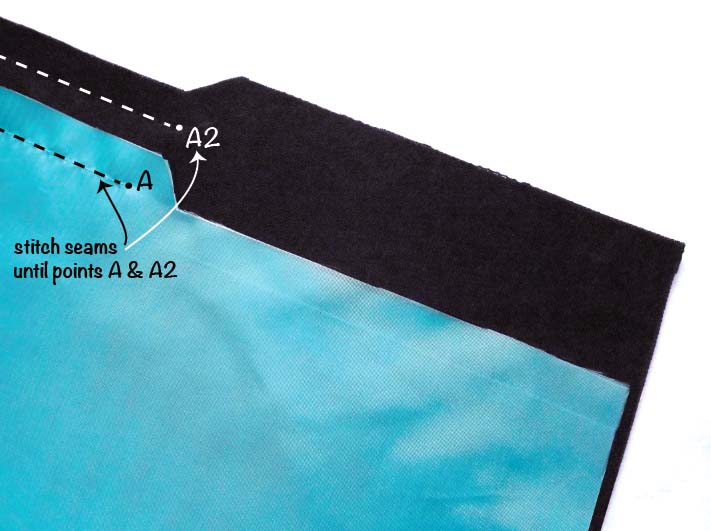
- stitch garment and lining seams (right side to right side)
- seams should be stitched until points A & A2
STEP 3:
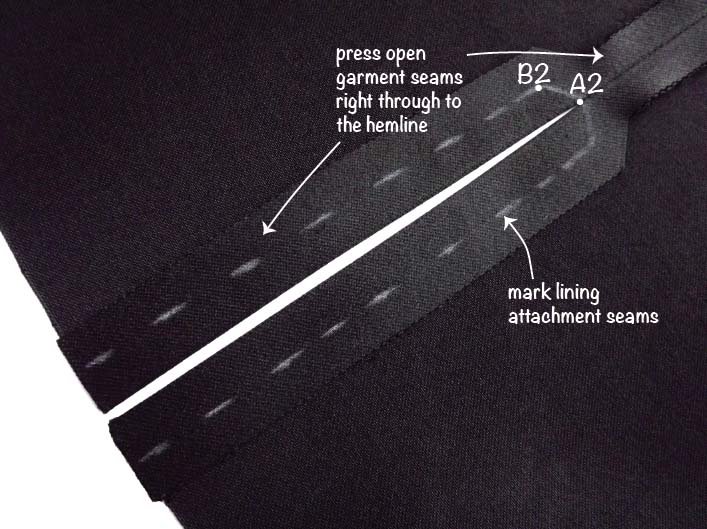
- press open garment seams right through to the hemline
- mark lining attachment seams
- point B2 indicates garment slit seam corner point
STEP 4:
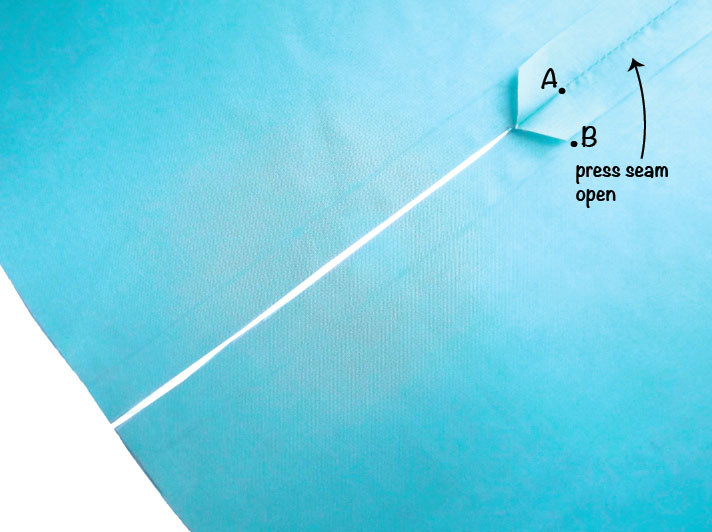
- press lining seam open (only up to point A)
- point B indicates lining slit seam corner point
STEP 5:
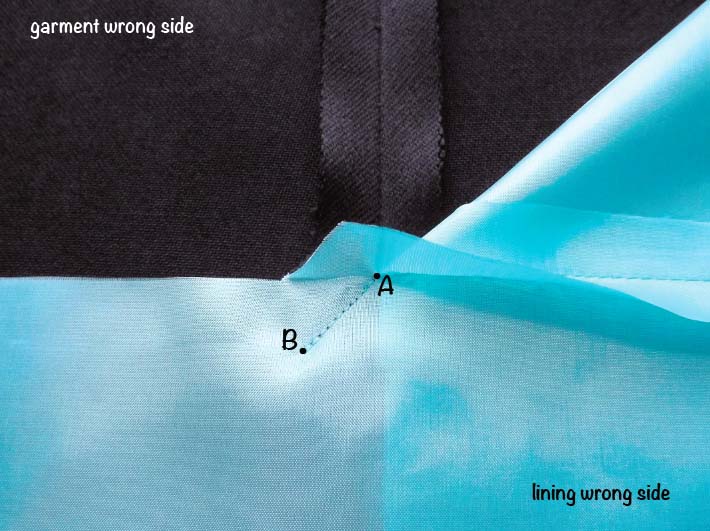
- place lining on the garment matching points A with A2 and B with B2
- stitch seams together from point B into corner of the point A
STEP 6:
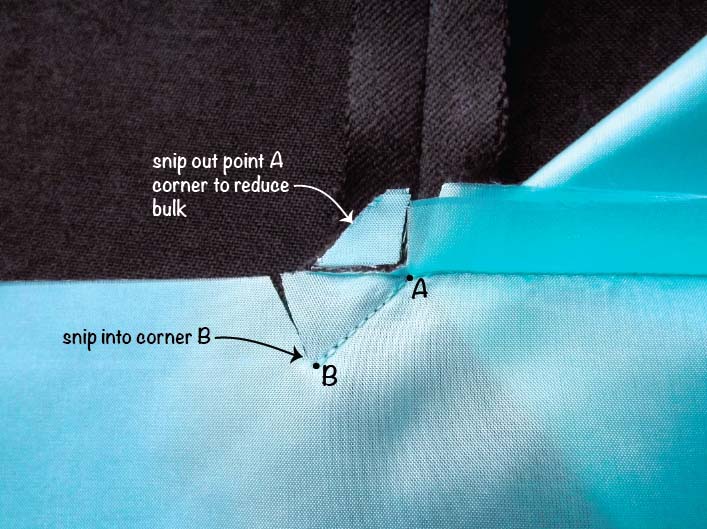
- snip out point A corner to reduce bulk
- snip into corner B to allow fabric manipulation
STEP 7:
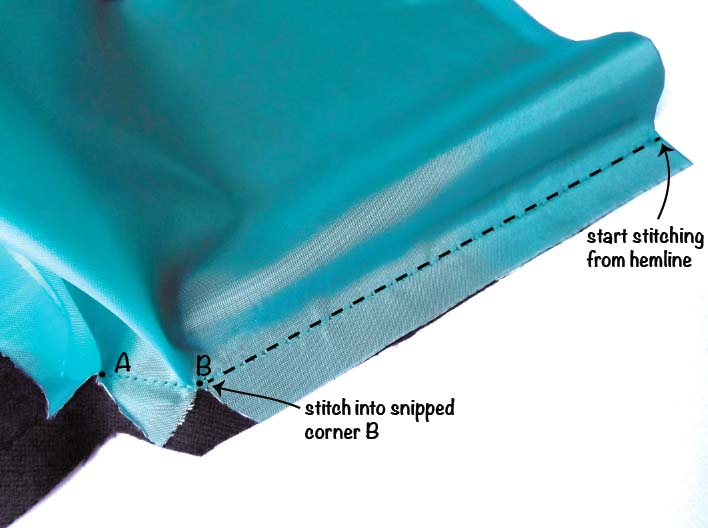
- open up snipped corner B and align slit and garment seams
- stitch seams together starting from the hemline into point B
- repeat steps 5 to 7 for the opposite slit side
STEP 8:
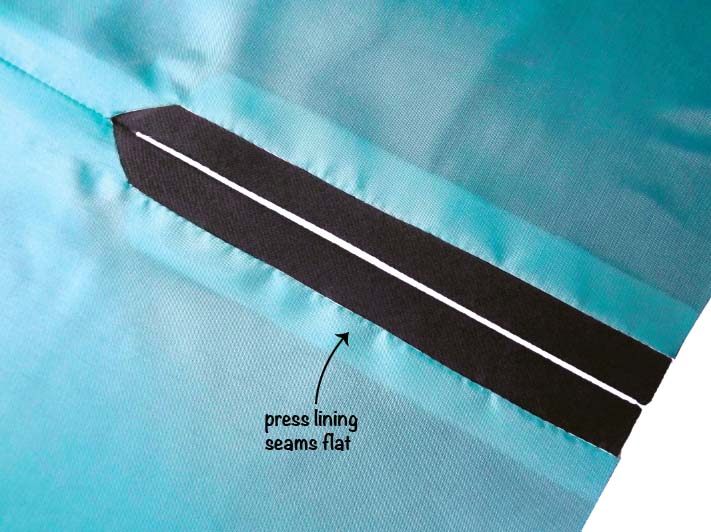
- press lining seams flat
I hope your lined slit turned out nice and neat! All that’s left is to finish off your hem. And a lined hem is a topic I will touch upon in the very near future.