I love invisible zips! They have this great quality called hiding…. if I can put it like that! You ask why? Simple! Because invisible zip is inserted in such a way that fabric conceals it from being seen. Lets get straight to it! Below you will find step by step instructions on how to insert your invisible zip.
STEP 1:
A seam, where you will be inserting your invisible zip (we will call it centre back seam as it is the most common place for zip insertion), has to remain unstitched. It will be sewn once zip is inserted.
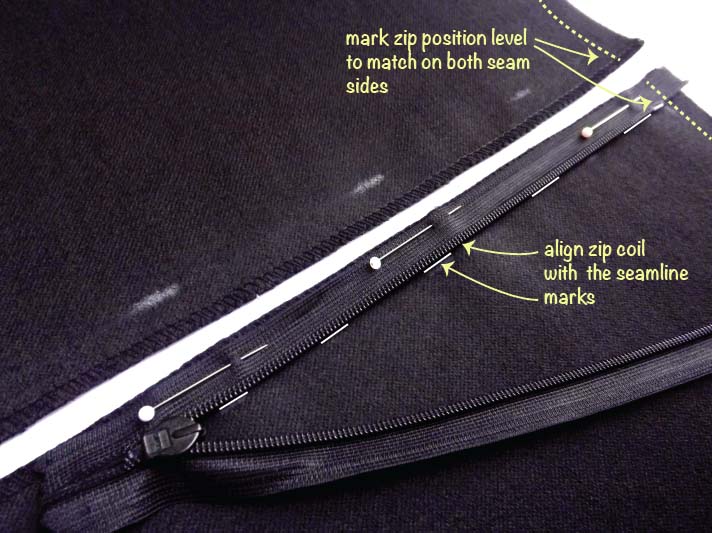
- place a side of the zip on the centre back seam (right side to right side) so that zip coil aligns with the seam line
- mark zip position level to match on both seam sides. It will help your seams to meet at the same level once zip is closed.
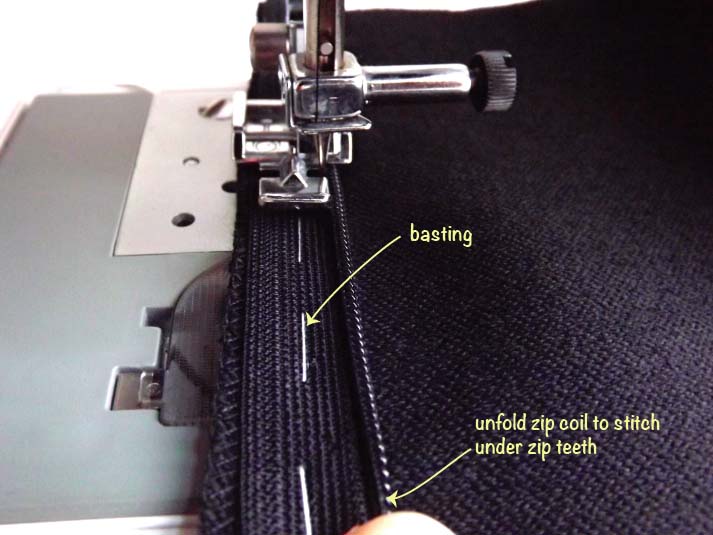
- pin in place or baste for better support once stitching
Basting – long easy removable stitches, sewn by machine or hand, to temporarily sew fabric together. Those should be removed after your seam has been sewn.
STEP 2:
- stitch zip from the top using invisible zip foot
- unfold zip coil to stitch under zip teeth
STEP 3:
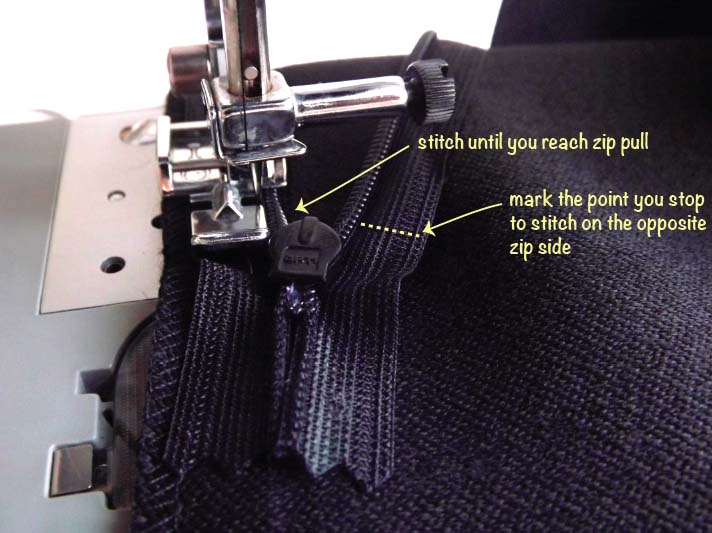
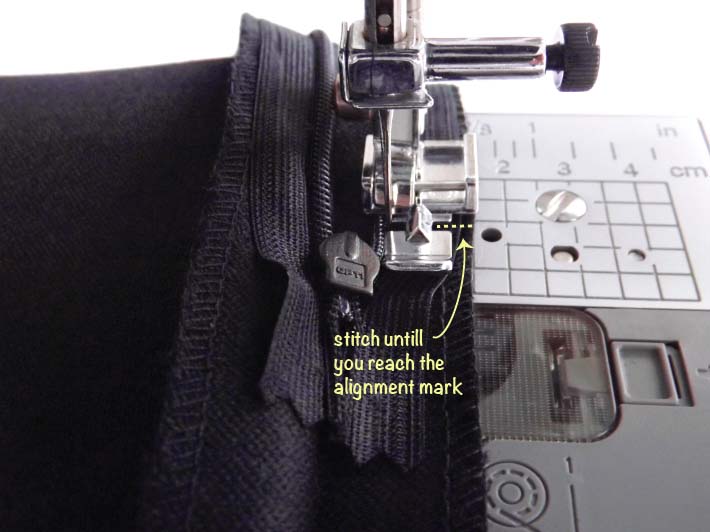
- stitch until you reach your zip pull
- mark the point you stop to stitch on the opposite zip side. It will help you to align both zip sides
STEP 4:
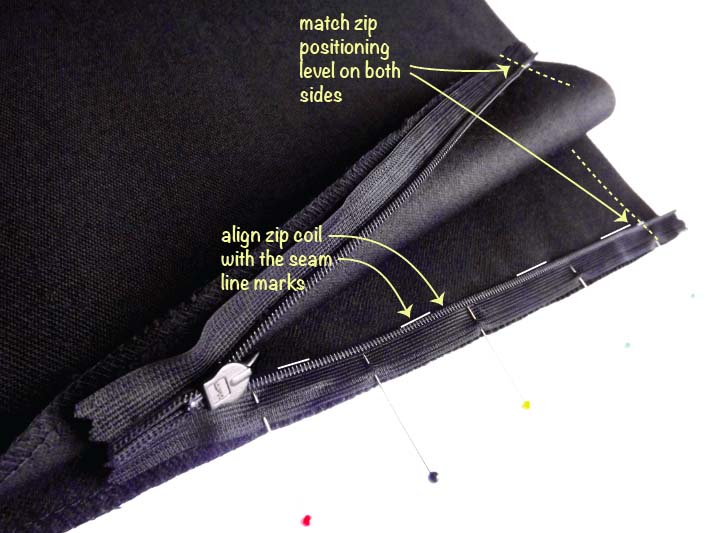
- place the opposite (unstitched) zip side on the opposite centre back seam and align zip coil with the seam line (right side to right side)
- pin in place or baste for better support once stitching
STEP 5:
- start stitching from the top until you reach zip pull and the mark you made for zip seam alignment
STEP 6:
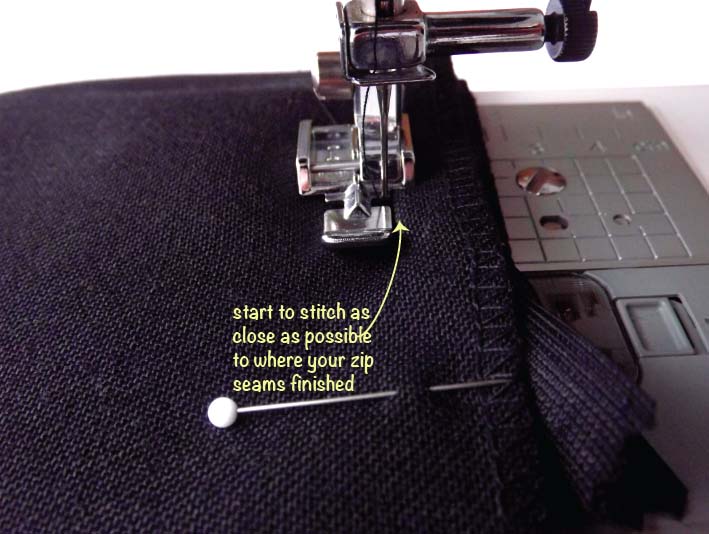
- once zip is inserted, you need to sew the remainder of the centre back seam
- pin centre back seam right side to right side
- start stitching as close as possible to where your zip seams finished
STEP 7:
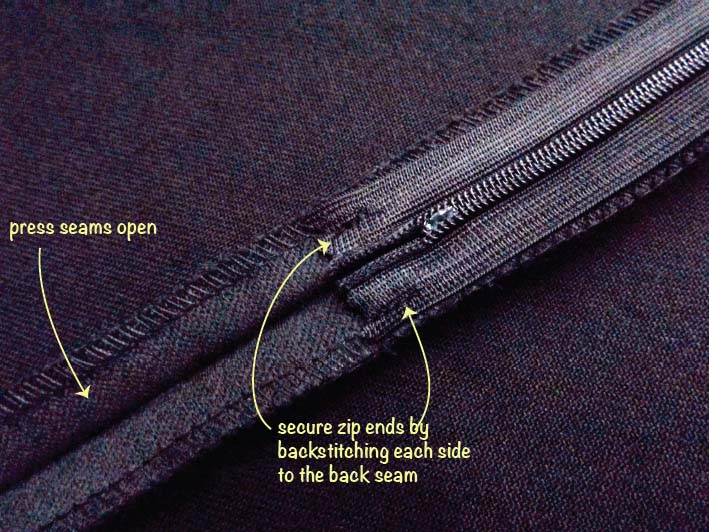
- press centre back seam open
- secure zip ends by backstitching each side to the back seam
Your zip insertion has been completed!


