After mastering our invisible zip tutorial you may have thought “How do I now finish a seam where the invisible zip has been inserted?”
There are several options available including piping, lining and facing, depending on what kind of garment you are making and what look you would like to achieve. But, this week we will concentrate on one particular technique. You have probably guessed by now which one exactly… the article title is a dead giveaway!
Yes, you are right, the spotlight goes on facing attachment this week. Our tutorial will teach you how to sew facing to a garment that has an invisible zip inserted at the centre back seam. The same approach can be used if you would like to attach a skirt facing, or any other facing you creatively come up with!
Here are the steps for you!
STEP 1:
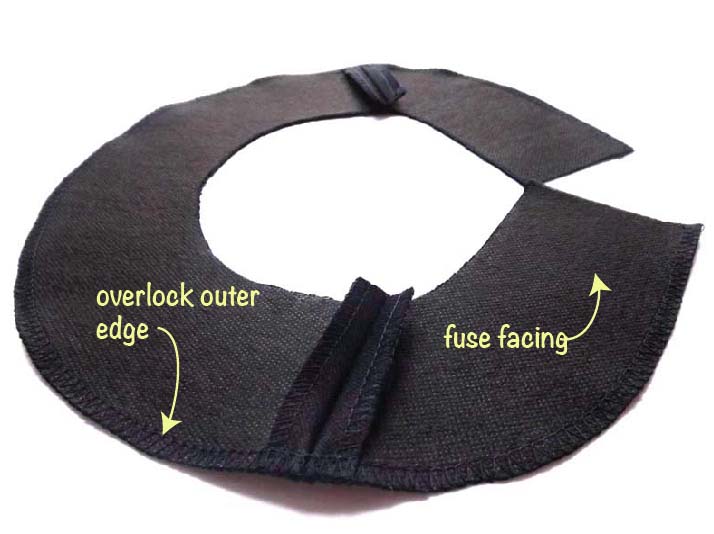
- fuse interfacing to the wrong side of the neck facing
- stitch facing shoulder seams
- press seams open
- neaten seams and outer facing edge with overlock or zigzag stitch
STEP 2:
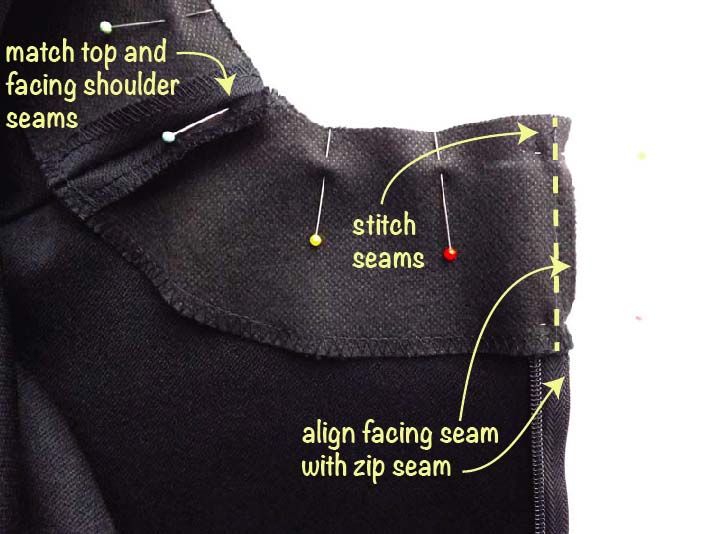
- pin facing to the neckline, right side to right side, so that the top and facing shoulder seams and centre front notches match
- align facing centre back seam with zip seam
- stitch aligned seams
STEP 3:
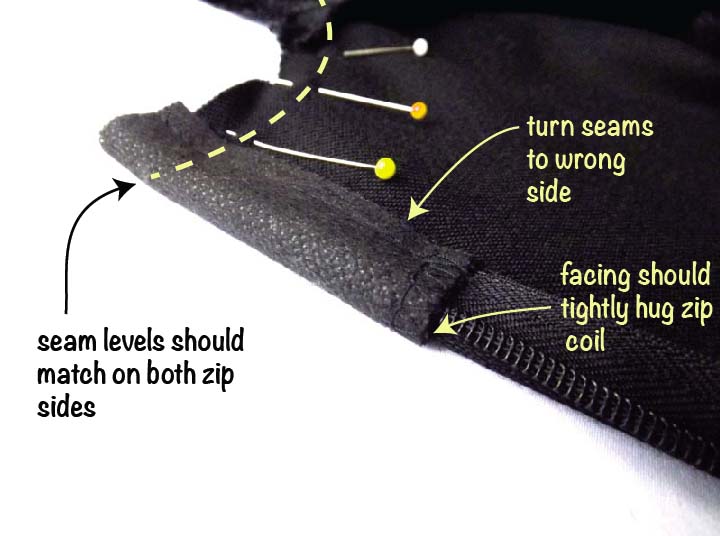
- turn stitched centre zip seams to the inside so it tightly hugs zip coil
- stitch neckline seams
STEP 4:
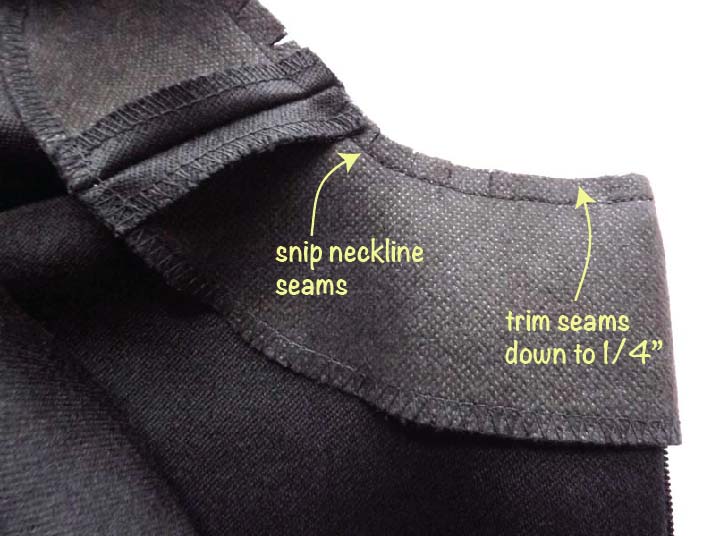
- once neckline is stitched, trim neckline seams down to 1/4”
- snip neckline in areas it curves
STEP 5:
- turn facing so it is inside the garment
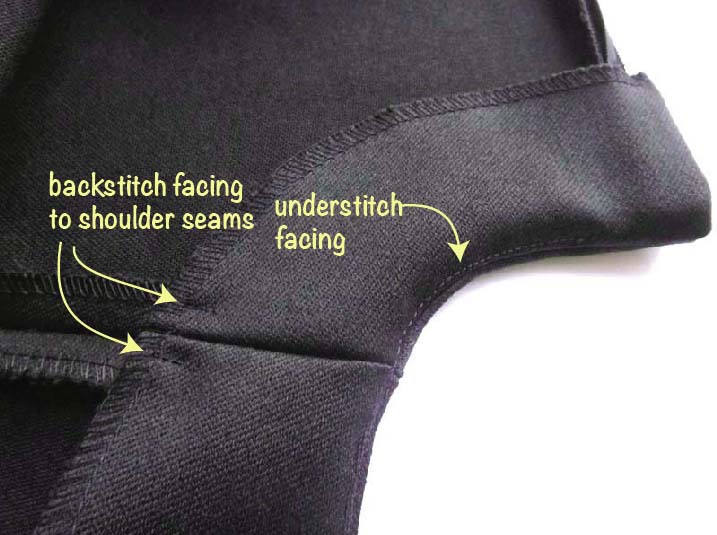
- understitch facing – press neckline seam allowances towards facing and stitch close to the edge of the seams on the facing side
- secure facing at the shoulder seams – match shoulder seams and backstitch facing to the garment shoulder seams
There you go! You should now have a lovely facing attached to your garment.


