Buttons, buttons, buttons…where do we start? Those round, square and misshaped creatures can sometimes cause us a bit of a headache and some confusion as to where they have to be placed in order to achieve a balanced look to your garment.
If buttons and buttonholes are positioned incorrectly your garment may be too tight, or too loose creating some gaping. The number of buttons on the garment is really down to your personal choice and design. Although a good guideline to start positioning your buttons vertically is keeping in mind your body pressure points.
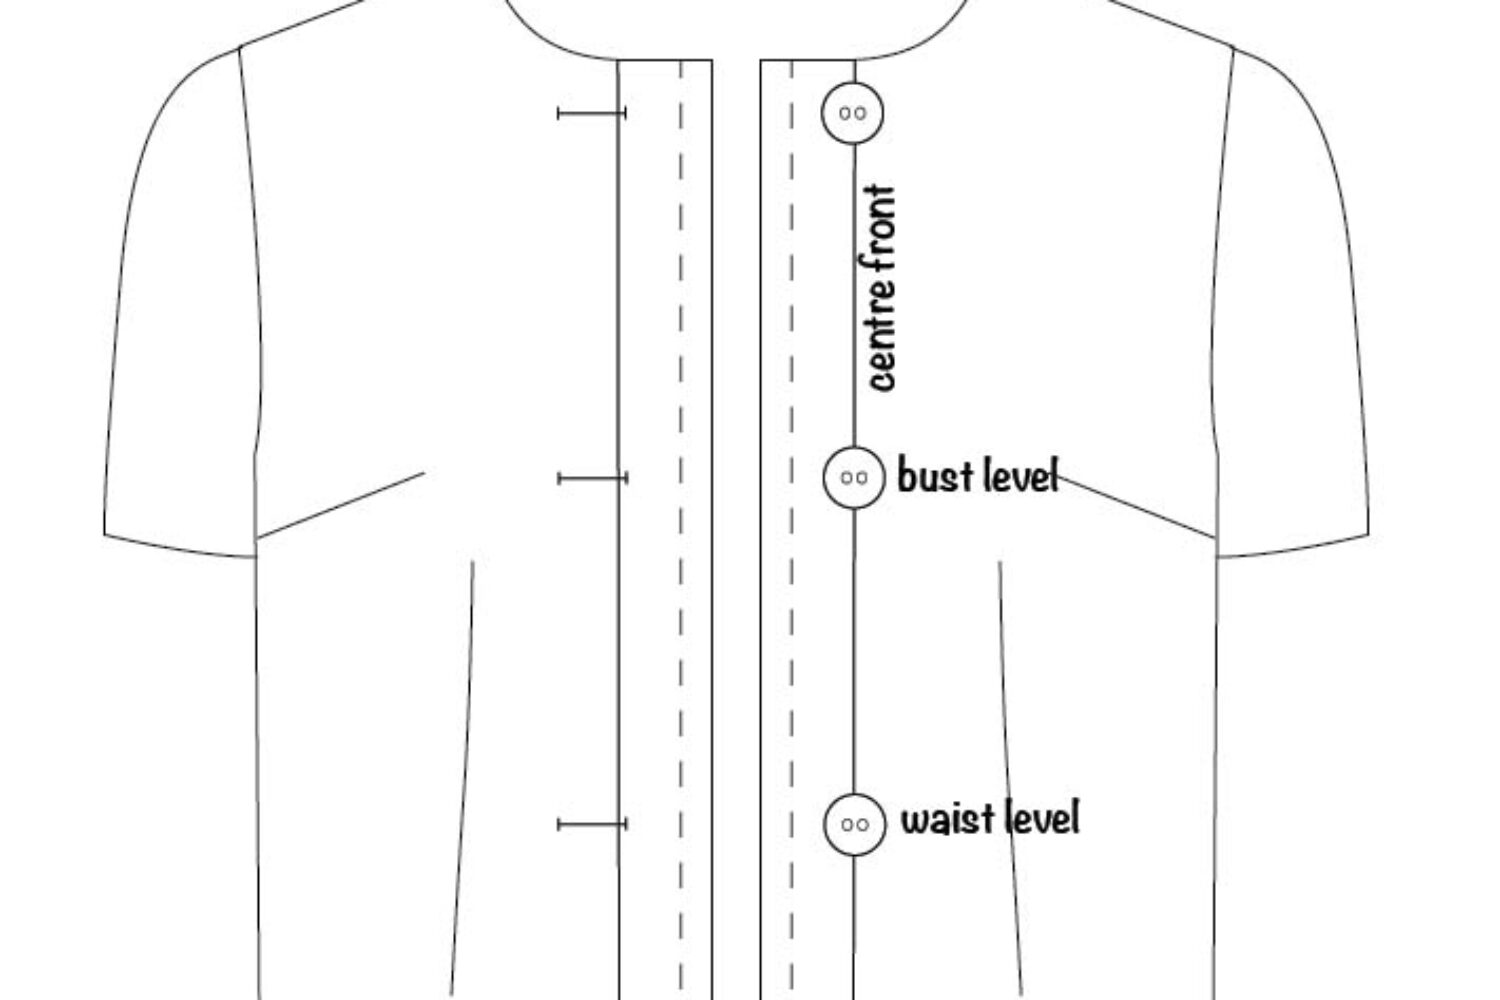
What do I mean by pressure points? These are the points that would have the most strain on the garment when the human body is moving and these parts of the garment need more support. The pressure points for a closure that is positioned on your centre front are bust level, waist level and hip level. Good positioning would have buttons at those levels and more buttons added evenly in between.
Right, let’s get straight to it and examine the positioning for a 1” wide button.
Here are the steps for you!
STEP 1:

- decide how many buttons you will have on your garment
- position your buttons vertically making sure the distance between all buttons is equal
- we have chosen 3 buttons of 1” diameter for our garment
- closures for womenswear is right side over left side
STEP 2:
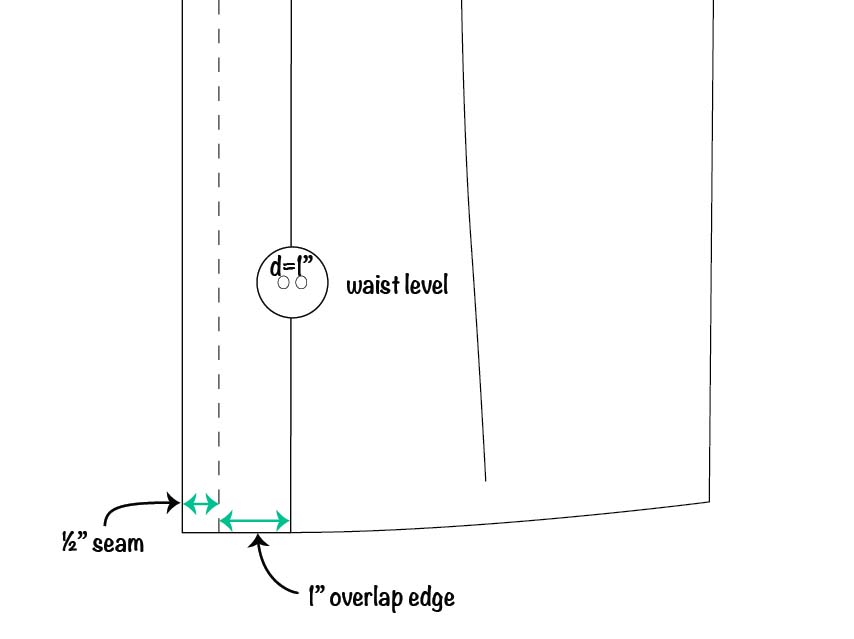
- allow an overlap width(the width from the centre of the garment to the edge)
- the overlap width equals the diameter of the button, which will allow the edge to look in balance with the size of the button
- our button is 1” wide so the overlap will also be 1” wide
- to finish your overlap edge you need to have a seam allowance, we used a 1/2” seam
STEP 3:
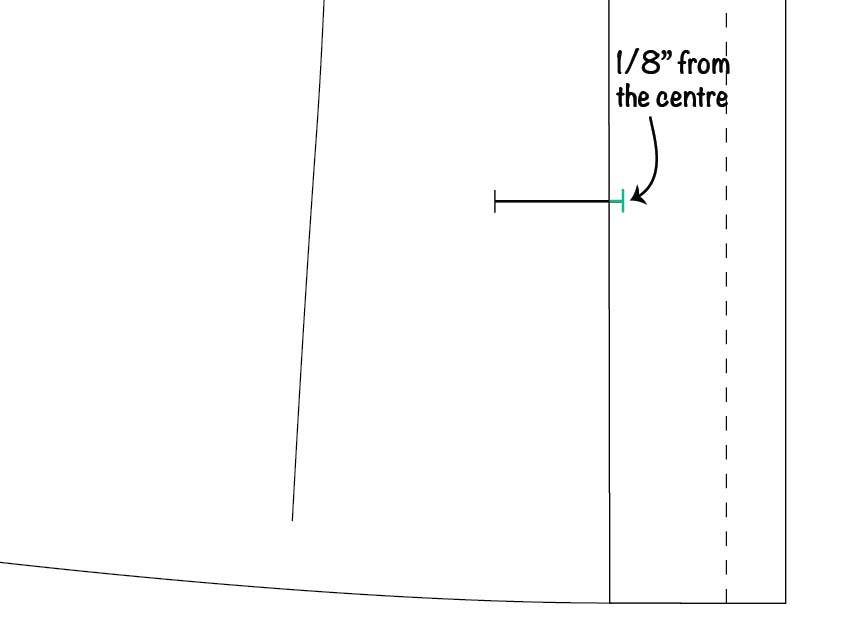
- position the buttonhole on the opposite side of the garment
- the buttonhole is positioned 1/8” away from the centre towards the edge, which allows a button to sit exactly on your centre front line once it is buttoned-up
These guidelines can be used for any button width that you decide to work with. Once you know the width of the button you will be using you can work out the allowances accordingly.
What has been the hardest part for you when working with buttons and buttonholes?