This week has really been a pocket week in the studio. It seems as if everyone has conspired and decided to do as many pockets as possible. So this week’s tutorial just had to be a pocket.
One of the most common pockets you will come across is a patch pocket. It is a handy compartment and can be easily added to a garment you are creating, or to a garment you already have, but would like to enhance with your own creative touch.
Below you will find the steps to draft a pattern for your patch pocket and detailed instructions on how to sew one.
Happy sewing!
STEP 1:
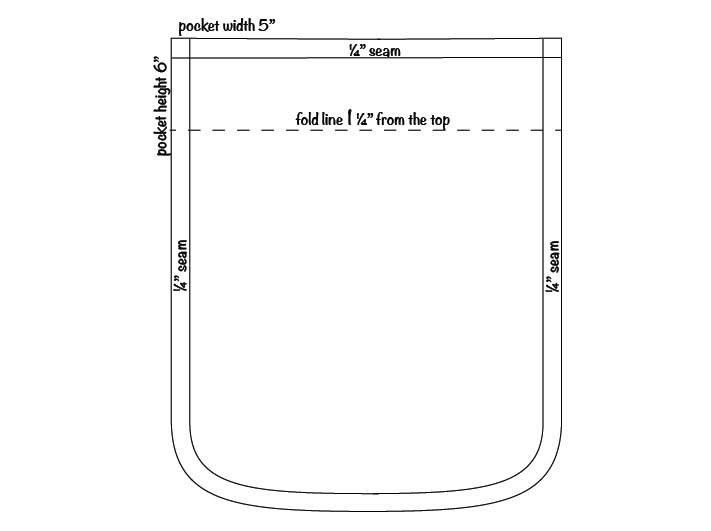
- draft your pocket as illustrated
- pocket height and width can be adopted to your own preferred measurements
STEP 2:
- cut out your pocket
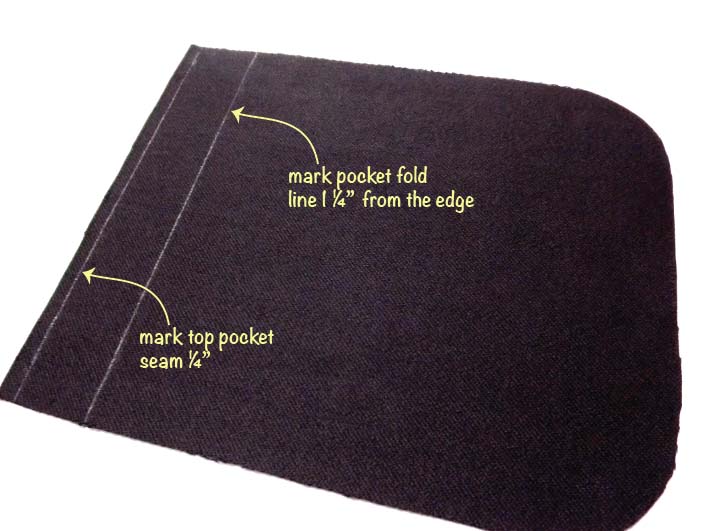
- using tailors chalk, mark top patch pocket seam ¼”
- mark top patch pocket fold line 1 ¼” from the edge
STEP 3:
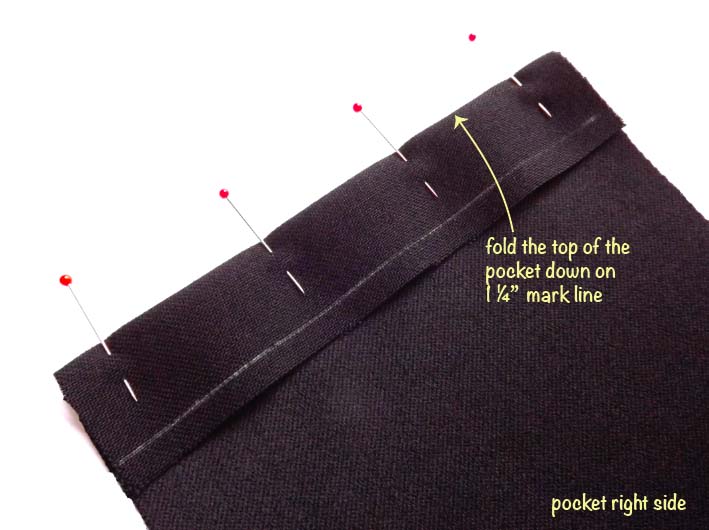
- fold the top of the pocket down on your 1 ¼” mark line(right side to right side)
- pin in place
STEP 4:
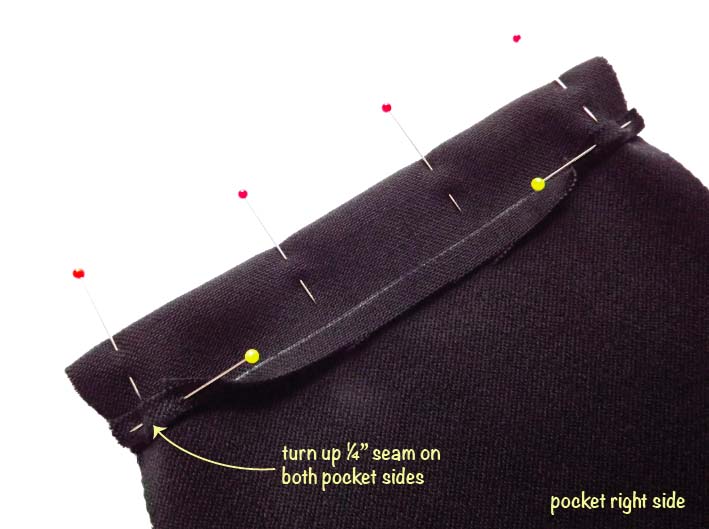
- turn up ¼” seam on both pocket sides
- pin in place to secure
STEP 5:
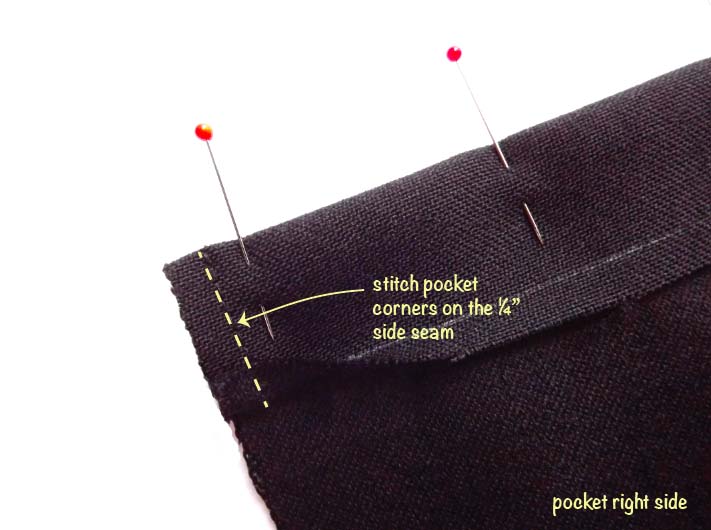
- stitch turned up pocket corners as illustrated
- stitch should run on the ¼” side seam
STEP 6:
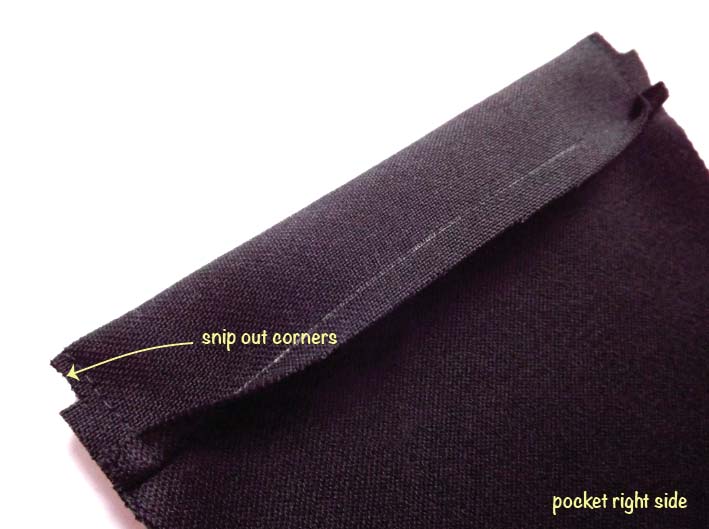
- snip out pocket corners on both sides
STEP 7:
- turn the pocket top edge over to the right side
- push out corners to achieve sharp corner look
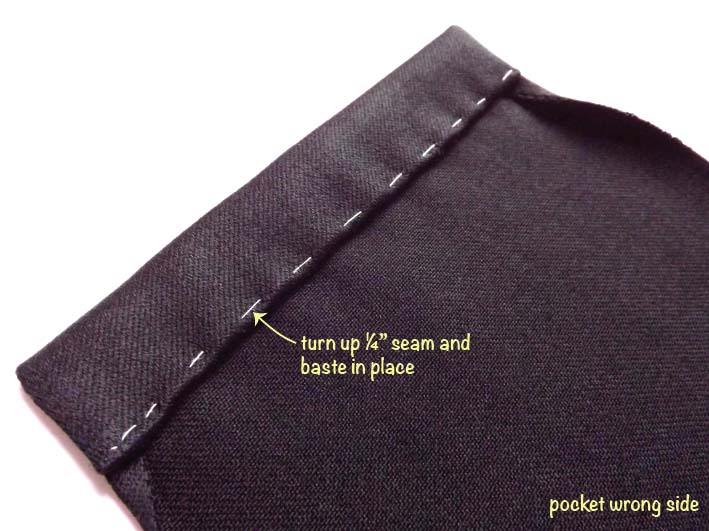
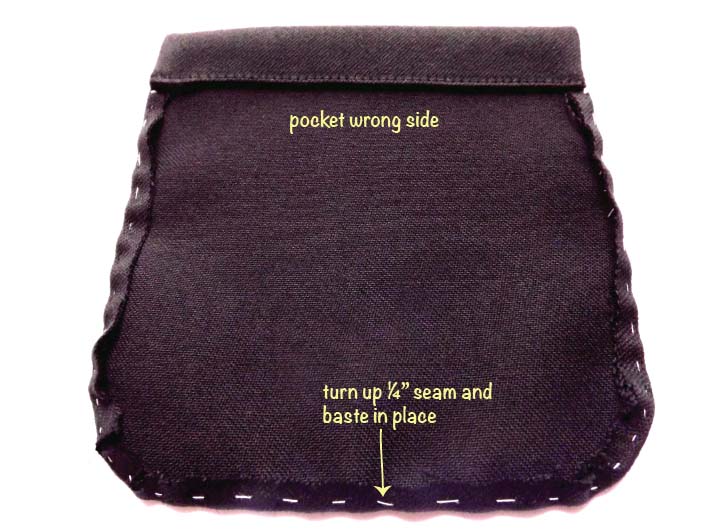
- turn up ¼” seam and baste in place
STEP 8:
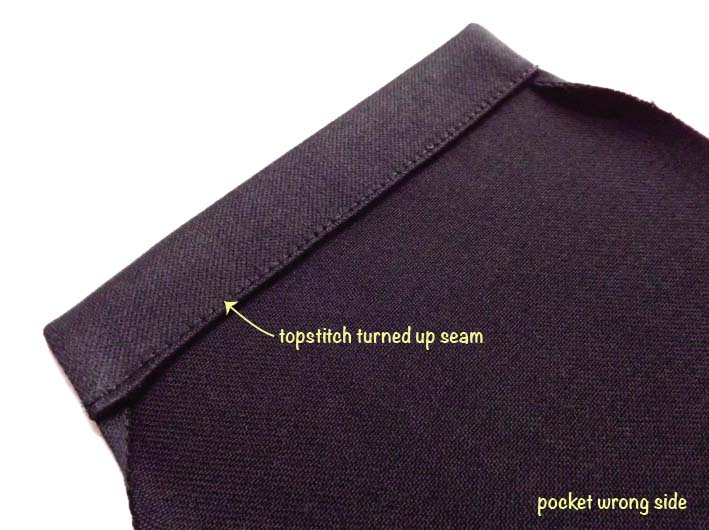
- topstitch turned up seam
STEP 9:
- turn up ¼” pocket seam
- baste the seam in place for support and to achieve neat corner curves
STEP 10:
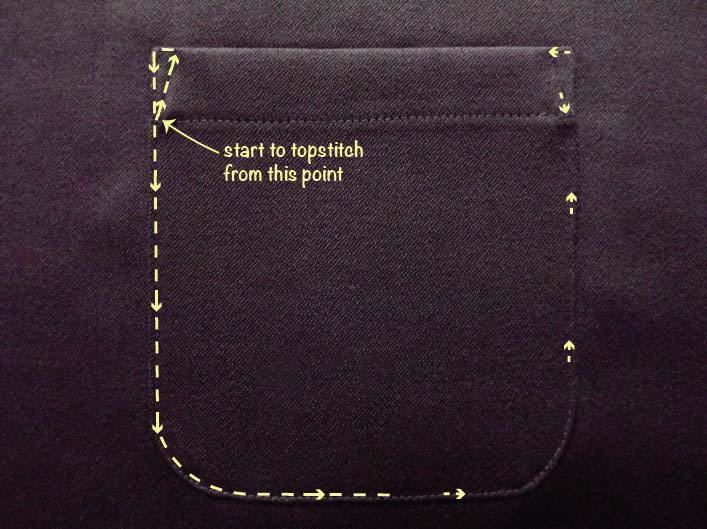
- place pocket on the garment and secure in place
STEP 11:
- topstitch around the pocket
Did you find this tutorial helpful? And what more tutorials you would like to see?
It would be great to hear some feedback. So don’t be shy, scroll down to our comments section and leave us a little note.
Until the next time!


