
A sleeve placket might be a bit of a mystery at first glance and may leave some us of slightly puzzled as to how it all comes together – probably due to the fear of the unknown rather than the complexity of it.
There are many ways that a sleeve placket can be sewn and I am sure you will find your own preferred method. In the meantime, I wanted to share the method that I use a lot and find works very well.
You can add a sleeve placket to a garment that you are sewing from scratch, or be creative and customise something that you already have in your wardrobe.
Here are the steps for you. I am sure once you sew one you will be well on the way to becoming a sleeve placket master!
STEP 1:
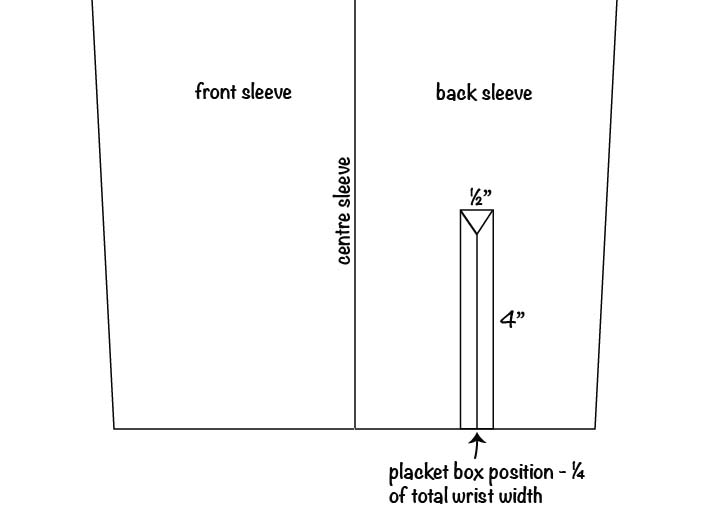
- follow the guidelines illustrated for positioning placket box
- placket box positions on the back of the sleeve – ¼ of total wrist width, measured from the side seam
STEP 2:
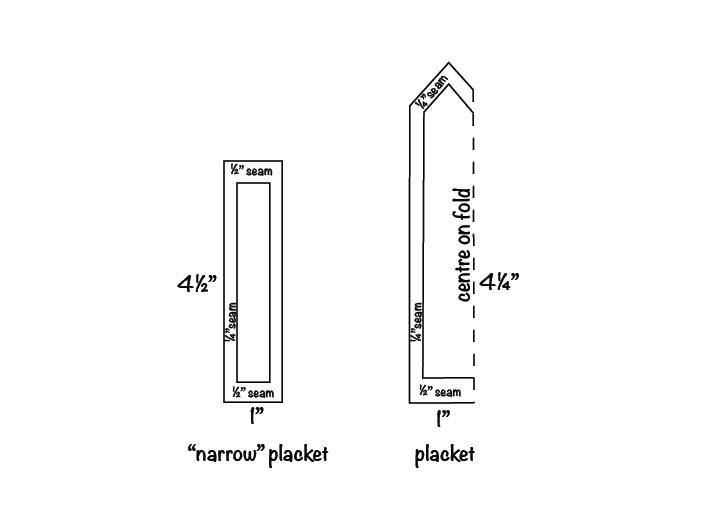
- draft placket patterns as shown above
- cut out all details
STEP 3:
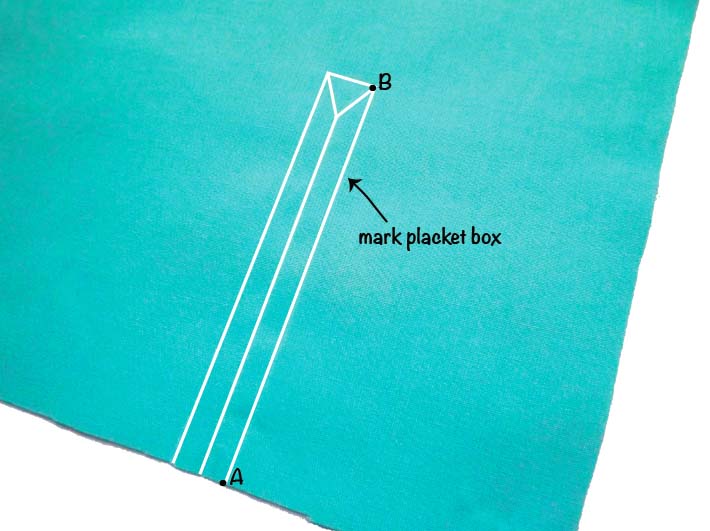
- mark placket enclosing box on your sleeve as illustrated
- A to B length of placket 4”
STEP 4:
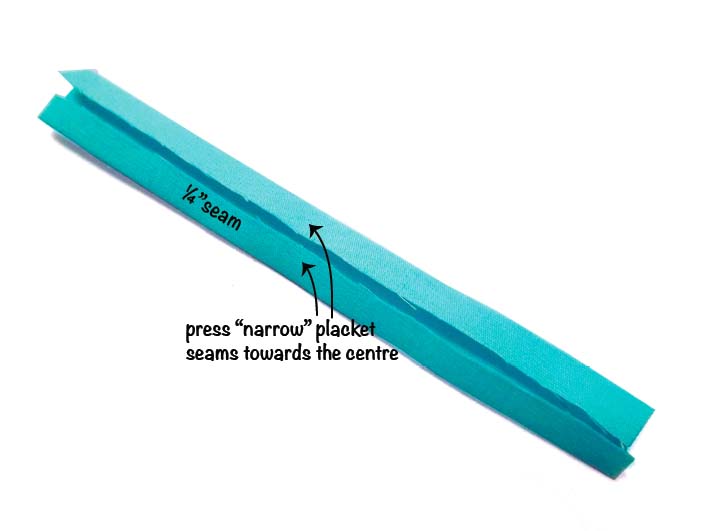
- prepare your smaller placket (we will call it “narrow” placket) by pressing its ¼” seams towards the centre (wrong side to wrong side)
STEP 5:
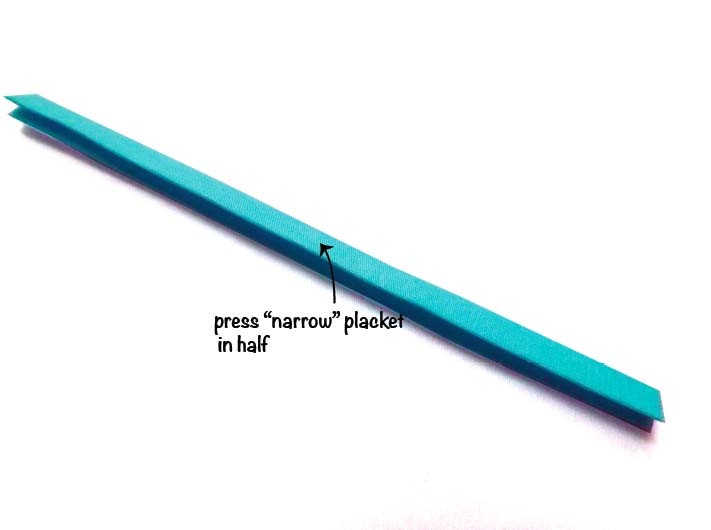
- press “narrow placket” in half so that the seams are inside it
STEP 6:
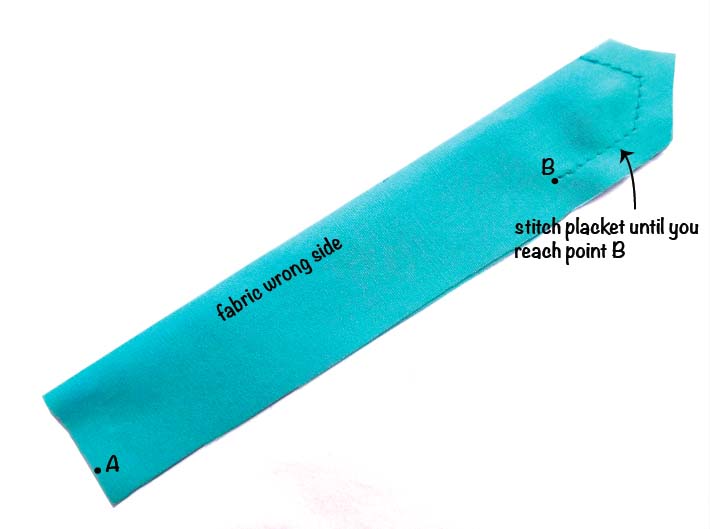
- prepare your second placket (we will call it “wide” placket) – fold in half right side to right side
- mark length of your placket box A to B
- stitch “wide” placket tip part until you reach point B
STEP 7:
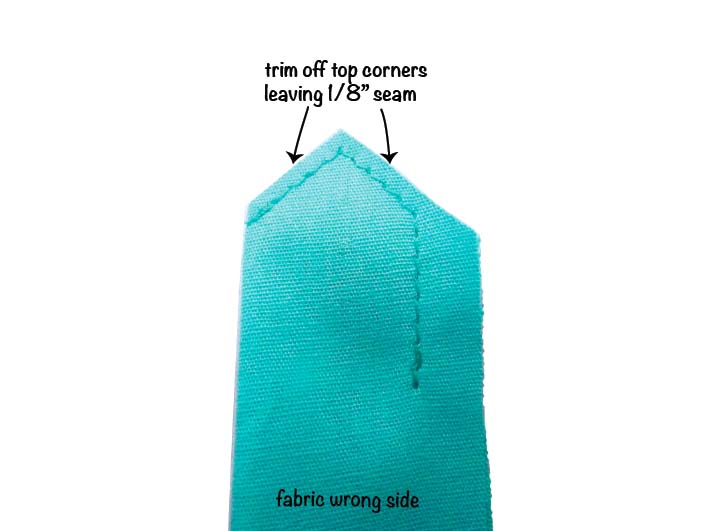
- trim off placket top corners leaving 1/8” seam
STEP 8:
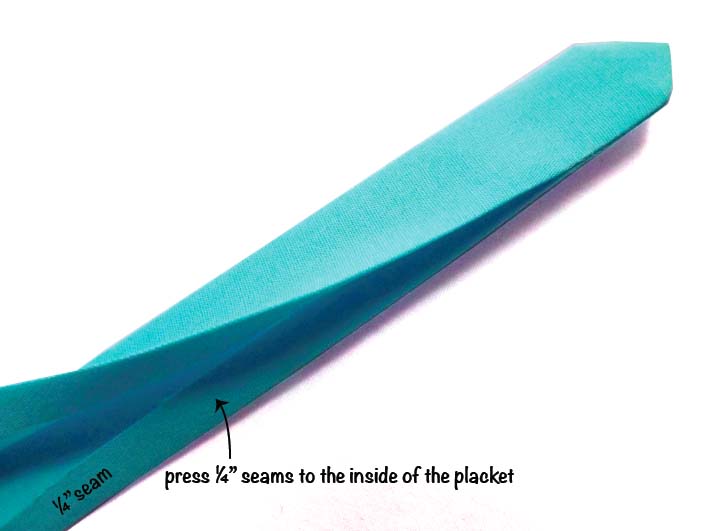
- turn placket to the right side
- press ¼” seams to the inside of the placket
STEP 9:
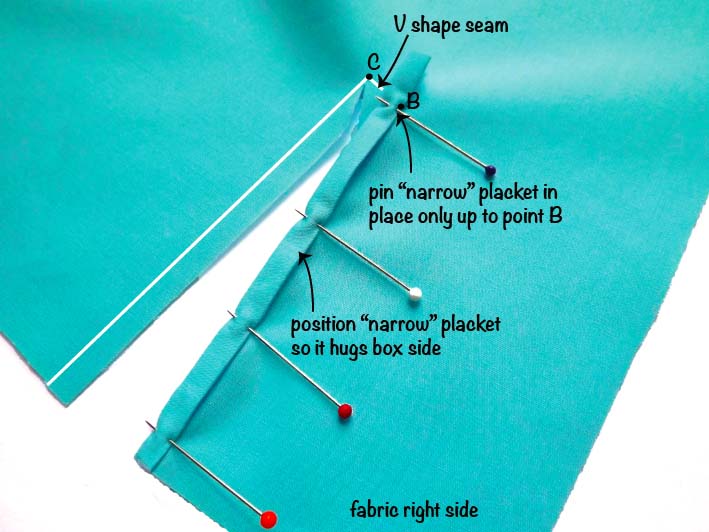
- cut placket box centre line slashing into corners C and B creating V shape seam
- position “narrow” placket so that it hugs one box side (side which is positioned closer to side seam) and pin in place up to point B
STEP 10:
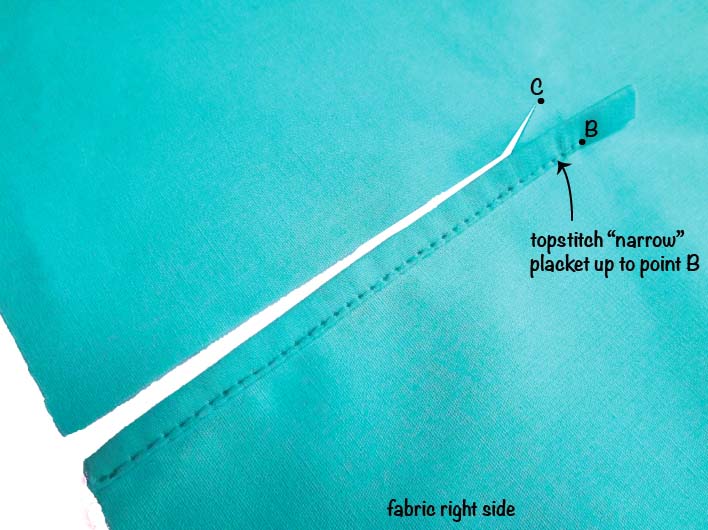
- topstitch “narrow” placket up to point B
STEP 11:
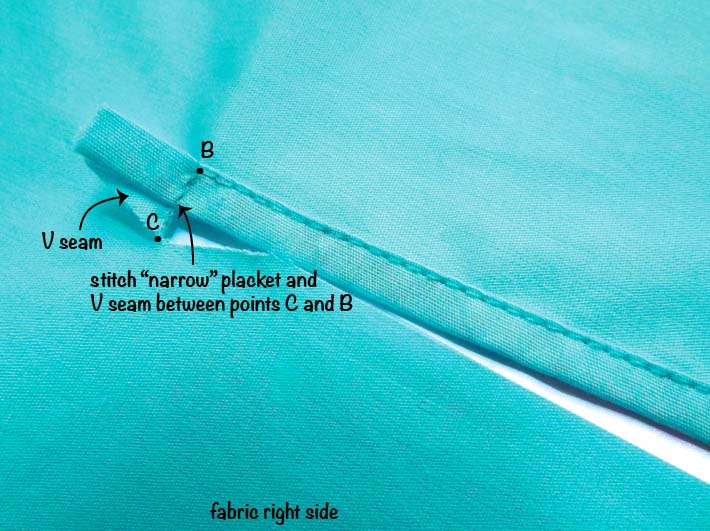
- position box V seam as illustrated – folded up, positioning on the right side of the fabric
- stitch “narrow” placket and V seam between points C and B
STEP 12:
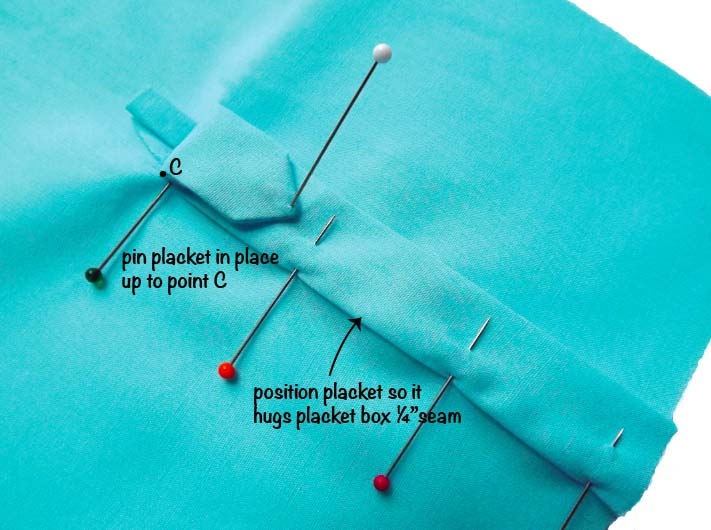
- position “wide” placket on the opposite placket box side so it hugs ¼” seam
- pin in place up to corner point C
STEP 13:
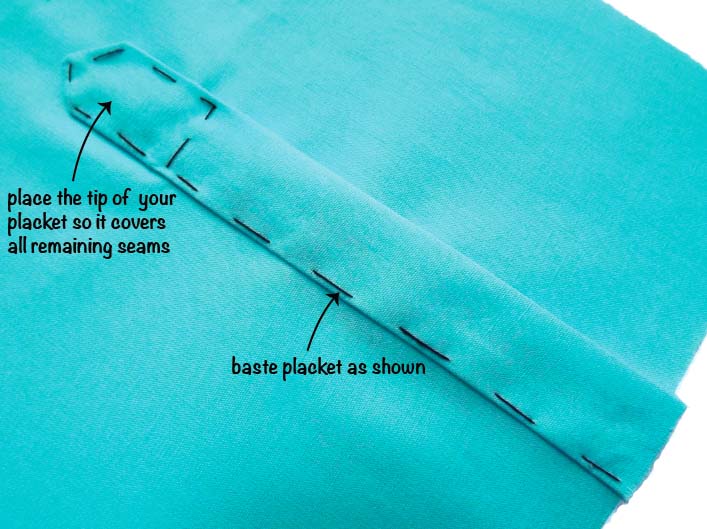
- place the tip of your placket so it covers “narrow” placket and V shape seams
- baste it in place as illustrated (your stitch line will be sewn exactly along the basting line)
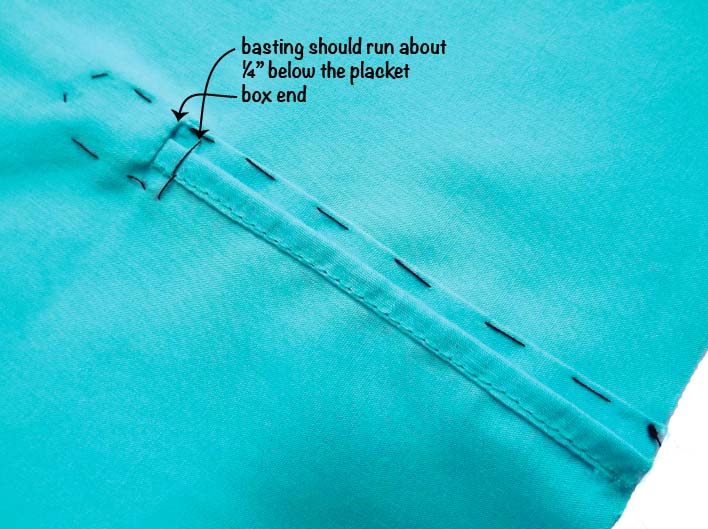
- basting should run about ¼” below the placket box end
STEP 14:
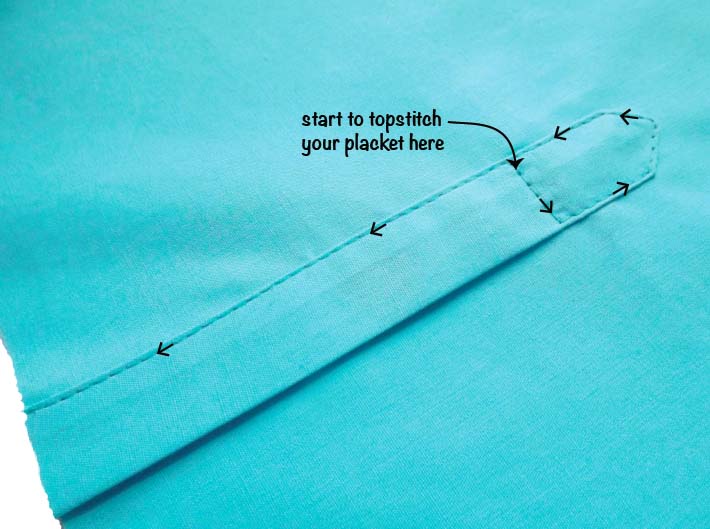
- topstitch the placket
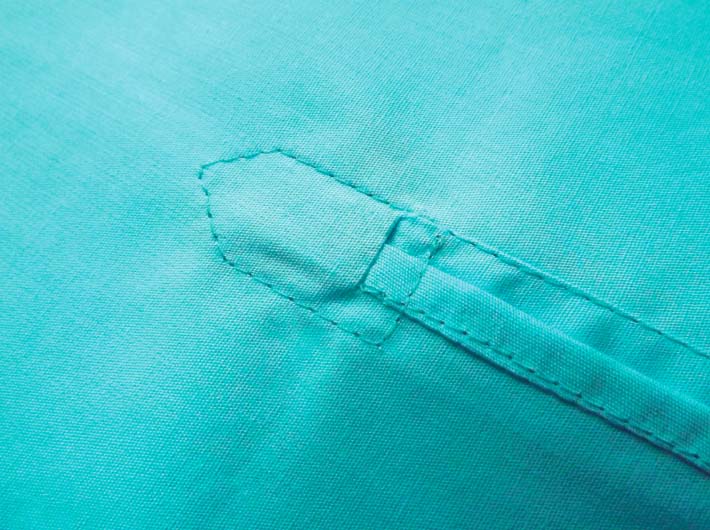
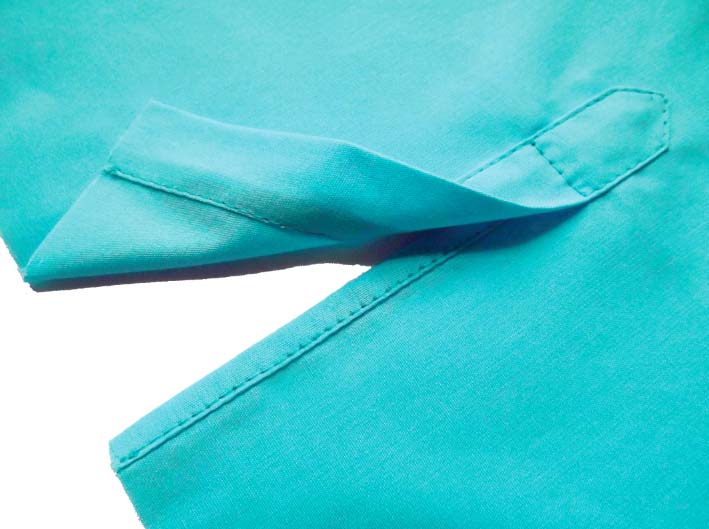
Hopefully you have mastered all the steps and have a lovely finished sleeve placket!